
Station Name: PADIHAM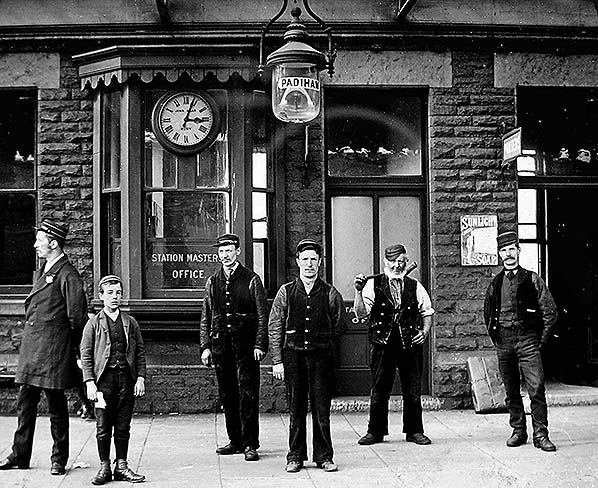
Station staff stand in front of the station master's office on the down platform at Padiham station in the first decade of the 20th century. The station master's office bay window contains the platform clock; it shows four minutes past three. A large glass domed lamp hangs from the building's awning and has the station name on the glass. An advert for Sunlight soap hangs from the wall of the building. The clock in the station master's office window was made by John Agar, at the time working out of Bury, Lancashire. He supplied many clocks and pocket watches to the L&Y railway company.
Photo from John Mann collection 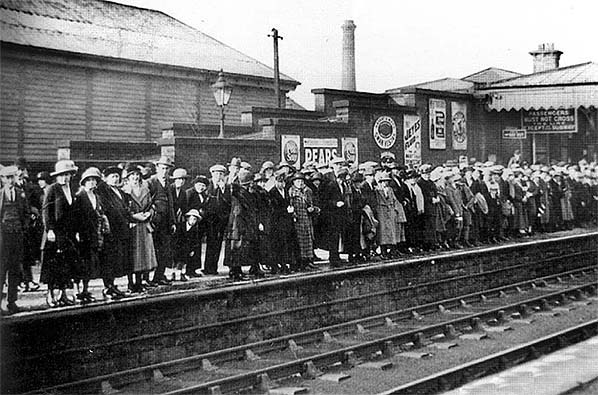 A large number of people gather on the up platform for an excursion, most likely to Blackpool, taken in summer time in the 1920's. A sign reminding people only to cross the line by subway is clearly readable, and in front a ‘Way Out’ sign is fixed to the building's wall. There was usually plenty of advertising at stations and Padiham was no exception. You can see for instance adverts for Pear's soap as well as others.
Photo from John Mann collection 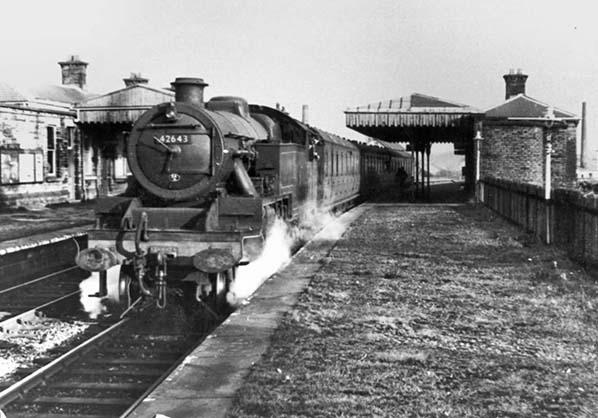
4P-E 42643 stands at the up platform circa 1956 on its way along the loop line to Great Harwood and Blackburn. Many of these local services terminated at Blackburn. Note the typical combination of tank engine and three carriages. The view is from the Blackburn end. The station is now beginning to look uncared for and would close the following year.
Photo
from John Mann collection
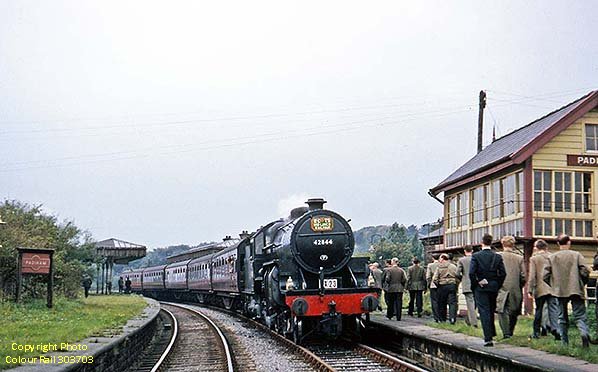
22 September 1962, the RCTS Mid Lancs Railtour 1X23 pulled by a Hughes Crab 42844 stands at Padiham's down platform next to the signal box, with 5 carriages. This photo was taken from the Rose Grove end looking west. The tour came from the Blackburn direction and travelled the length of the loop line. Near the bottom left of the photo, on the up platform the LMS Hawkseye station name sign can been seen. The station was given the new BR signs in 1957 but for some reason they were never installed. Some of the passengers are having a stroll around the station and 4 people have made it onto the up platform. Most of the two platform areas are covered with grass as nature starts to take over. To the left of the signal box, the first floor of the ground level building can be seen. This first floor was the station manager's house with a connection from the front door (which faced the down platform) to a gate that led directly onto the platform.
Photo copyright Colour Rail 
A passenger excursion train heads west circa 1962. The curve of the down platform gives you an idea of why the wheels of a train would often complain as they passed the station. The glass covered ramp up to platform level is seen on the left, and the unpaved area of the station is just starting to look a little overgrown. In the distance are the two three hundred foot cooling towers of Padiham power station.
Photo by Geoffrey Robinson from John Robinson's Steaming North Last days of the North East Lancs Loop Line collection  An excursion passenger train heads out of the station circa 1962. The engine (most likely a black 5) is about to cross the bridge over Station Road. Out of sight because of the carriages was Padiham signal box which was situated on the Rose Grove end of the down platform. On the up platform, the sign “CROSS LINE BY SUBWAY” can clearly be read, and at the Rose Grove end of the platform, the large wooden LMS Hawkseye sign lies at the very end near the Station Road bridge. This train is going east towards the 1 in 40 bank up to Rose Grove.
Photo by Geoffrey Robinson from John Robinson's Steaming North Last days of the North East Lancs Loop Line collection 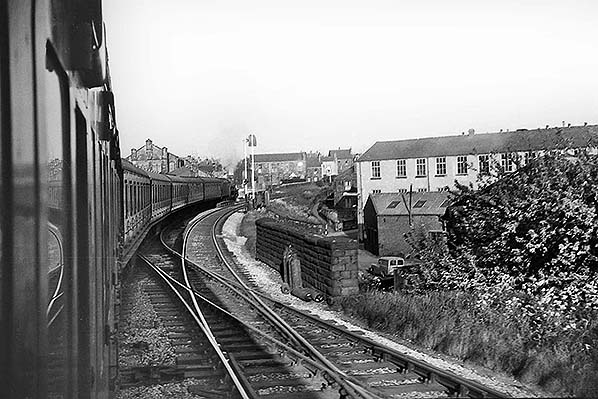
Just beyond the station, the excursion train heads towards Padiham itself over two bridges. The first (stone bridge) carries the line over a weir that runs off the river Calder. On the left at this point was one of the original signal boxes (Padiham East) which was removed in 1913. The crossover and track running right off the main line ran into the goods yard and refuge siding. The second bridge, where the engine has got to, is over Green Lane. The train itself is heading east towards Rose Grove.
Photo by Geoffrey Robinson from John Robinson's Steaming North Last days of the North East Lancs Loop Line collection
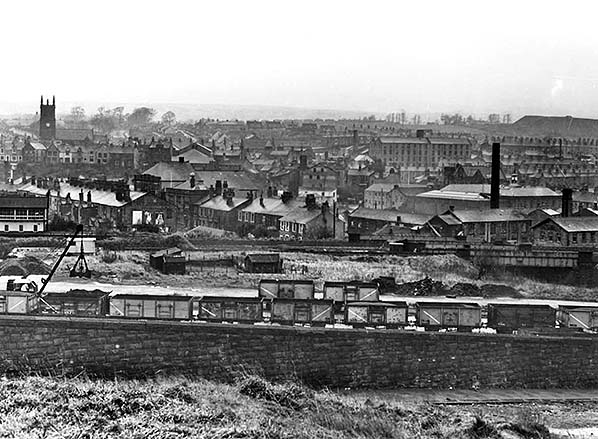
Padiham goods yard c1963. Coal wagons sit on the coal sidings nearest to the yard's outer wall. A mobile crane with a grab unloads coal from the wagons, and piles of coal can be seen next to a siding. The original crane was a Goliath crane but was removed in 1953. To the left Padiham signal box can be seen as can (on the right) Station Road bridge which carried the main running lines into the station.
Photo ftom John Mann collection  The Locomotive Club of Great Britain The Rossendale Forester rail tour stands at Padiham station on a cold frosty and snowy day 3 December 1966. A few enthusiasts gather on both platforms to take pictures. On the right is the down (eastbound) platform and on the left the up one. The photo was taken from the Rose Grove eastern end of the down platform. The two cooling towers of the power station can be seen in the distance. By this date the down line had been cut back to just beyond the platform area on the western end, and the up line (although closed) west of Padiham was still extant all the way along the loop line. The engine is 42644 a class 4P 2-6-4 tank engine which has just come up from the power station.
Copyright photo from the Burnley Civic Trust Heritage Image Collection 
Another view of 4P-E 42644 pulling carriages of the LCGB The Rossendale Forester rail tour on 3 December 1966. The tourt ran from Manchester Victoria with 42644 hauling the legs from Clifton Junction to Accrington South Junction and Church and Oswaldtwistle to Manchester Victoria. The tour tour coincided with the passenger closure of Rawtenstall-Bacup and Ramsbottom-Accrington services and had been arranged at fairly short notice. The location seen here is just beyond the western end of the platforms at Padiham next to the goods yard entrance. The enthusiasts walk around the location taking in the atmosphere.
Copyright photo from the Burnley Civic Trust Heritage Image Collection 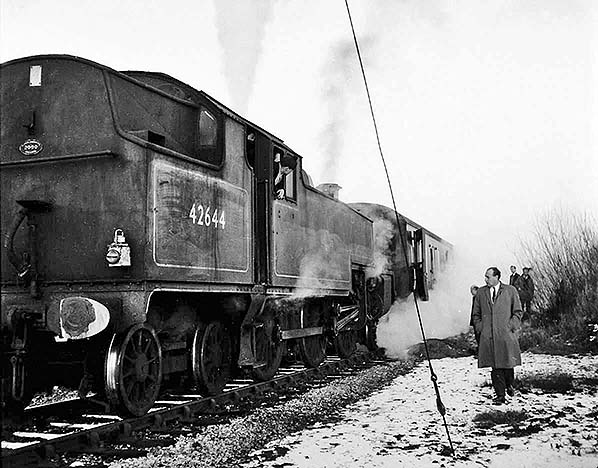 A final view of 42644 at the goods yard entrance area west of the platforms at Padiham. The tour will head down to the power station and will then return back up through Padiham to Rose Grove for the rest of the tour to Manchester Victoria. A final view of 42644 at the goods yard entrance area west of the platforms at Padiham. The tour will head down to the power station and will then return back up through Padiham to Rose Grove for the rest of the tour to Manchester Victoria.Copyright photo from the Burnley Civic Trust Heritage Image Collection Click here for Padiham Station Gallery 3:
|
 Home Page