
THE WOODSIDE AND BIRKENHEAD DOCK STREET TRAMWAYOf the Hoylake & Birkenhead Rail & Tramway Company[Source:
Paul Wright]
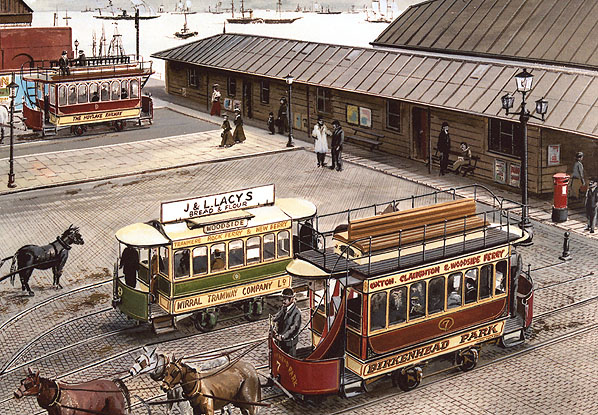 The Woodside terminus of the Hoylake & Birkenhead Rail & Tramway Company street tramway as it would have appeared in 1877. The Hoylake line is seen in the background with a tram waiting to depart for Dock station. In the foreground are trams of the Wirral Tramway Company. The two systems had no physical connection.
By G S Cooper courtesy of Dave Cooper  The Birkenhead Woodside terminus of the Hoylake & Birkenhead Rail & Tramway Company street tramway that linked Birkenhead Dock station to the Liverpool ferries shown on an 1874 map. 
Birkenhead Woodside shown on an 1876 town plan. The rails of the Hoylake & Birkenhead Rail & Tramway Company street tramway are to the north. To the south are the rails of the Birkenhead Tramway Company.
 Birkenhead Woodside shown on an early 20th century map. The Woodside and Birkenhead Dock tramway is shown as disused at this time.
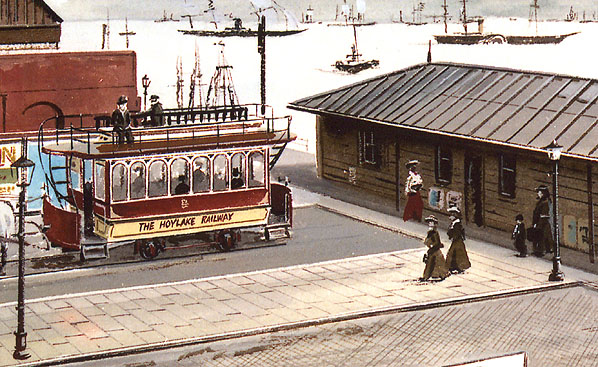 A close up view of the Hoylake & Birkenhead Rail & Tramway Company street tramway terminus at Birkenhead Woodside in 1877. One of the company's trams is seen waiting to depart for Birkenhead Dock station. The company simplified its name on the side of its trams to The Hoylake Railway. By G S Cooper courtesy of Dave Cooper .jpg)
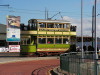
Looking east towards Birkenhead Woodside along the route of the Hoylake & Birkenhead Rail & Tramway Company street tramway on 3 September 2013. The 1990s heritage tramway follows very closely the original route at this point.
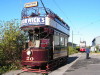
Photo by Paul Wright .jpg) The site of the Hoylake & Birkenhead Rail & Tramway Company street tramway Woodside terminus looking west on 3 September 2013. The site of the Hoylake & Birkenhead Rail & Tramway Company street tramway Woodside terminus looking west on 3 September 2013.Photo by Paul Wright .jpg) Looking east along Beaufort Road towards Woodside on 3 September 2013. TheHoylake & Birkenhead Rail & Tramway Company street tramway ran in the centre of the road. In 1888 when Birkenhead Dock station closed its new western terminus was adjacent to the white van.
Photo by Paul Wright .jpg)
Looking north-west towards the site of Birkenhead Dock station from Beaufort Road on 3 September 2013. The tramway followed the curve of the road and then passed north along Wallasey Bridge Road before curving west and terminating alongside the station. From 1878 the tramway crossed the railway that connected the Hoylake line to the Birkenhead dock system. The level crossing gates of that line can be seen in the photograph. After 1888 the tramway was cut back to
a point just to the east. Photo by Paul Wright .jpg) Looking south along Wallasey Bridge Road on 3 September 2013. Birkenhead Dock station was to the right of the black car. The street tramway curved west at this point and ran into a covered shed which was its western terminus. Passengers could transfer directly between train and tram making Birkenhead Dock the worlds first tram to train interchange. Photo by Paul Wright
|

.jpg)
.jpg)
 Home Page